FMOD Studio User Manual 2.02
- Welcome to FMOD Studio
- FMOD Studio Concepts
- Organizing the Project
- Authoring Events
- Working with Instruments
- Managing Assets
- Parameters
- Getting Events into Your Game
- Mixing
- The Sandbox
- Editing During Live Update
- Profiling
- Dialogue and Localization
- Using Source Control
- Supporting Downloadable and User-generated Content
- Advanced Topics
- Quick Start Tutorial
- Effect Reference
- Event Macros Drawer Reference
- Instrument Reference
- Keyboard Shortcut Reference
- Modulator Reference
- Parameters Reference
- Plug-in Reference
- Scripting
- Scripting API Reference
- Troubleshooting
- Glossary
- Appendix: Celeste Getting Started Guide
- Appendix: Reaper Integration
2. FMOD Studio Concepts
This chapter introduces several essential FMOD Studio concepts. Together, these concepts explain how the various components of an FMOD Studio project work together, and how to best develop an FMOD Studio project and implement it in your game.
This chapter is designed to be read before proceeding on to the rest of this manual, as the concepts introduced here come up frequently in later chapters.
2.1 FMOD Studio and the FMOD Engine
FMOD Studio is an application that allows sound designers and composers to create adaptive audio content for games.
The FMOD Engine is a runtime library for playing adaptive audio in games. It consists of two APIs: FMOD Studio API, and the FMOD Core API.
Content created in FMOD Studio can be built as .bank files, which can then be loaded and played in the FMOD Engine using the FMOD Studio API. The FMOD Core API allows audio programmers to create audio content without using FMOD Studio, and to interact with the FMOD Engine's underlying mechanisms.
FMOD for Unity and FMOD for Unreal Engine are packaged software integrations of the FMOD Engine for use in Unity and Unreal Engine games. Each package includes a copy of the FMOD Engine that is automatically installed along with the integration.
Bank files built in FMOD Studio are compatible with any version of the FMOD Engine that shares the same product and major version number as the copy of FMOD Studio used to create those banks, as well as with all later versions. For example, a bank built in FMOD Studio 2.02.03 can be loaded in FMOD Engine versions 2.02.00 and later, but not in earlier versions.
2.2 FMOD Versions
FMOD version numbers are split into three parts, in the format: productVersion.majorVersion.minorVersion. For example, the version number 1.23.45 would indicate product version 1, major version 23 of that product version, and minor version 45 of that major version.
2.2.1 Product and Major Version
Product and major versions contain significant changes, add new features, and may affect bank compatibility and change playback behavior in some cases. Updating to a new product or major version usually requires project migration.
2.2.2 Minor Version
Minor versions, also known as patch versions, contain bug fixes and smaller workflow improvements. Updating to a new minor version does not require project migration.
The first few minor versions within each major version are early access versions. Early access versions have passed our internal QA testing and been deemed stable. However, because they include new features and changes that have not yet been used in games, they may in some cases include bugs that only become apparent during actual game development.
2.2.3 Picking a Version
Every game has unique requirements, so the question "which version of FMOD is best" has a different answer for every game. That being said, here are some guidelines:
- When starting a new game project, choose the latest FMOD version. The latest version contains all the latest features and improvements, and so provides greater power and flexibility than any earlier version. In some cases, the tools and engine you're using to develop your game may require a specific FMOD version other than the latest; to learn whether this is the case, consult the specifications of your tools and engine.
- It's safe to use an early access version of FMOD in the early stages of a game's development, but be aware that you may need to upgrade to a later version before your game's release. If you do encounter a bug in an early access version, upgrading to a more recent minor version within the same major version is likely to solve the problem.
- It's safe to upgrade to a new minor FMOD version during a game's development. Minor versions only include bug fixes and improvements, so each new minor version tends to be more stable and efficient than the last. As such, it is generally safe to upgrade to a new minor version, as long as the major and product versions do not change. That being said, some game developers have a policy against updating middleware versions during development, even for bug fixes; to learn if this is true of your organization, consult your project lead.
- It's not safe to upgrade to a new major FMOD version during a game's development. Because new major versions may change behavior in ways that go beyond bug fixes, changing which major version your game uses mid-way through development may result in changes to your game's audio output. That being said, if you must upgrade to a new major version in order to gain access to new features, be sure to allocate plenty of time to testing your game's audio output afterwards, so that you can identify and address any changes in behavior that might result from the upgrade.
- It's not safe to change FMOD versions shortly before your game's release. A new version is different to previous versions by definition, and so there is always some risk that upgrading to new version could change behavior on which your game depends. It is therefore best to upgrade your version only if there is still plenty of time before your game's release date, so that you have time to notice and correct any issues that result from the upgrade.
- It is not necessary to upgrade the FMOD version used by a game whose development is complete. You should only change the FMOD version used by a game if doing so would fix a bug in that game, or allow you to make use of a feature found only in the new version. If you are no longer actively developing audio content for your game, and the audio content already in the game is working correctly, there is no reason to upgrade that game's FMOD version.
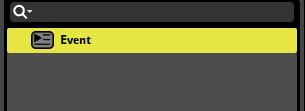
2.3 Event
An event is an instanceable unit of sound content that can be triggered, controlled and stopped from game code. As a rule, every situation in your game that produces a sound should have a corresponding event.
An event contains and is primarily composed of tracks, instruments, action sheets, and parameter sheets. Sheets provide your game with ways to trigger instruments. Triggered instruments output audio signals onto the tracks. The tracks route into other tracks, or into the event's master track. The output of the event's master track routes into the project mixer, where it can be incorporated into your game's output. In addition, the event's parameters can control and manipulate most properties of the event, of the event's instruments, and of effects on the event's tracks; and the event's logic markers can manipulate the event's timeline parameter.
Events can be created and organized in the events browser, edited in the event editor window, routed in the mixer window, and auditioned in context in the sandbox window.
For more information about using events through your game's code, see the Playing Events section of the FMOD Engine User Manual.
2.3.1 Events and Event Instances
Events are 'instanced,' meaning that multiple copies of a single event can play concurrently. This allows a single event to be used for multiple similar in-game occurrences; For example, a game with a '45 magnum gunshot' event would create a new instance of that event each time a gun was fired in-game.
Any aspect of an event that is randomized or which can vary over the event's lifetime can vary between instances of an event. This means that separate concurrent instances of a single event can each have unique parameter values and be producing different output at any given time.
2.4 Sheets
If you want an event to play audio, it needs instruments to play that audio, and sheets to trigger those instruments. A sheet is a part of an event that can contain instruments, and defines when those instruments play and how their signals are routed. You can view an event's sheets in the event editor window by clicking on their tabs in the sheet tab bar.

The sheet tab bar.
2.4.1 Action Sheets
Action sheets trigger instruments in response to the event starting to play. They're the most common kind of sheet, since events that play a sound as soon as they start are common in many games.
Each action sheet is a playlist of instruments, and starts playing those instruments either consecutively or concurrently when the event starts.

An action sheet.
For more information about action sheets, see the Action Sheets section of the Authoring Events chapter.
2.4.2 Parameter Sheets
Parameter sheets trigger instruments in response to their associated parameters having specific values. They're useful for events which need to play different sounds depending on your game's state, or which need to react to changes to your game's state while playing.
Each parameter sheet is a two-dimensional grid that allows you to position instruments under specific parameter values and on specific tracks. When the parameter's value is over an instrument, that instrument is triggered, and routes its output (if any) into the track.

A parameter sheet.
For more information about parameter sheets, see the Parameter Sheets section of the Authoring Events chapter. For information about parameters, see the Parameters section of this chapter, as well as the Parameters and Parameters Reference chapters.
2.4.3 Timeline Sheets
A timeline sheet is a parameter sheet that references a timeline parameter and can support logic markers. Because timeline parameters continually increase in value while the event is playing, timeline sheets are useful for music and other sounds that require precise timing.
Like other parameter sheets, each timeline sheet is a two-dimensional grid that allows you to position instruments under specific timeline values and on specific tracks. When the timeline parameter's value is over an instrument, that instrument is triggered, and routes its output (if any) into the track.

A timeline parameter sheet.
Timeline sheets also support timeline logic, which allows you to define complex time-based behaviour for a timeline's parameter playback position.
For more information about parameter sheets, see the Parameter Sheets section of the Authoring Events chapter. For information about parameters, see the Parameters section of this chapter, as well as the Parameters and Parameters Reference chapters. For more information about timeline logic,
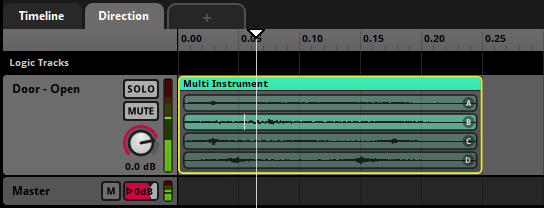
2.5 Instruments
Instruments are triggerable elements that route audio content into the tracks of an event or trigger behavior through snapshots and commands. Instruments appear in the 'editor' section of the event editor window as colored boxes.


These colored boxes are called trigger regions, and can be placed on the tracks and action sheets of events in the editor.
Each instrument is on a particular parameter sheet or action sheet that can trigger it, and only appears in the event editor window's editor when that sheet is displayed. An instrument on a parameter sheet is triggered when the parameter sheet's playback position begins to overlap the instrument's trigger region; an instrument on an action sheet is triggered when the event starts or when the previous instrument on the same action sheet finishes playing.
A triggered instrument does something specific, most commonly producing an audio signal. If an instrument producing a signal is on a parameter sheet, it outputs that signal to the track the instrument is on; if it's on an action sheet, it outputs that signal to the event's master track. Command and snapshot instruments do not produce audio signals, and are instead used to control the audio behavior of your game as a whole. See the command instruments section of the working with instruments chapter and the snapshots and the tracks view section of the mixing chapter for more information.
When the playback position ceases overlapping an instrument's trigger region, that instrument is untriggered. The behavior of an untriggered instrument is determined by a number of factors, including its cut behavior, whether it is synchronous or asynchronous, and whether any of its properties are subject to AHDSR modulation.
Clicking on an instrument in the event editor window's editor selects it, and displays its panel in the deck, allowing you to edit its properties and content. For more information about instrument properties, see the working with instruments chapter.
Many instruments feature a playlist. Playlists can contain other instruments or even events located elsewhere in the project. Whenever an instrument with a playlist is triggered, the instrument or audio file to play is selected from the playlist according to the instrument's playlist selection mode. By default, the playlist selection mode is shuffle. For more information about playlist behavior, see the instrument reference chapter.
The color of a trigger region is customizable, and has no bearing on the instrument's behavior.
2.5.1 Synchronous versus Asynchronous
Instruments on the timeline may be either synchronous or asynchronous. Instruments on parameter sheets other than the timeline are always asynchronous.
In synchronous instruments, the part of the audio file that plays always corresponds to the part of the trigger region's waveform graphic overlapped by the timeline playback position. This allows you to seek (or "scrub") within the audio files in a synchronous instrument by repositioning the timeline playback position.
In asynchronous instruments, the precise position of the playback position within the trigger region has no bearing on which part of each audio asset plays. This allows you to treat instruments as switches that can be turned on and off, adding sounds to the event on demand.
The synchronous or asynchronous behavior of an instrument can be identified by the appearance of the waveform graphics drawn on its trigger region: If the waveforms stretch all the way to the edge of the trigger region, the instrument is synchronous. If the waveforms are contained within borders, the instrument is asynchronous.
2.6 Audio Files
Audio files are the raw building blocks used to construct instruments and events in FMOD Studio.
Audio files are organised and managed in the assets browser, which can be found under the Assets tab of the event editor window, as well as in the audio bin window. You can import audio files into your project by dragging them into the assets browser from a file manager application, or from FMOD.io.
Once an audio file has been imported, you can add it to an action sheet or instrument's playlist by dragging the file onto that playlist, or to a single instrument or programmer instrument by dragging the file onto that instrument's asset preview or placeholder preview in the deck. You can also drag an audio file directly onto an audio track or action sheet in order to create a single instrument that uses that audio file, or onto the events browser to create an event that uses it.
Note that the compression format of audio files imported into your FMOD Studio project has no effect on your game's size or performance. This is because FMOD Studio's build process recompresses all audio files according to their platform encoding settings, effectively replacing any existing compression.
2.6.1 Working Outside Studio
FMOD Studio has a lot in common with Digital Audio Workstations (DAWs), but it does have one major difference: Almost all the effects and behaviors it applies to your game's sound are processed in real time as your game is being played, rather than in advance. This allows the behavior of events to change dynamically in response to changing circumstances in your game, but also takes up small amounts of CPU and memory.
If your game features events that make use of FMOD Studio's advanced features, but which always behave in exactly the same way then triggered, you may be able to save resources by 'baking' the desired behavior into your audio files in a third party DAW prior to importing them into your FMOD Studio project.
2.7 Track
In most cases, an event's tracks function as buses within the event, allowing each event instance to function as a small mixer. You can view an event's tracks in the event editor window by selecting any of its parameter sheets in the sheet tab bar. (Automation tracks do not function as buses, and are instead used in conjunction with parameters to control an event's properties.)
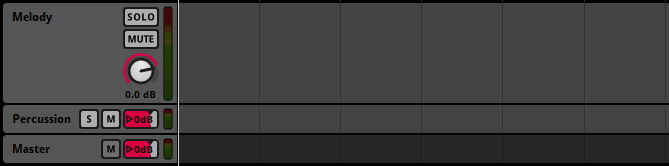
Audio tracks function as group buses. Each audio track creates a submix from the outputs of instruments on that audio track, as well as of any other tracks in the event that route into it.
Return tracks function as return buses. Each return track is a valid target for sends on other tracks in the same event, and creates a submix from the outputs of sends that target it.
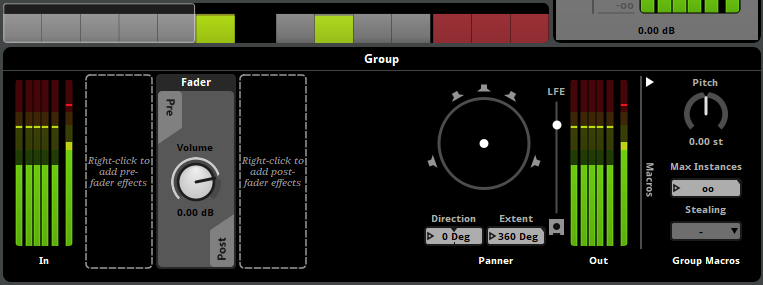
The master track functions as an event's master bus. All signals within an event eventually route into the event's master track, and from there into the project mixer.
2.7.1 Signal Chains
Each audio, return, or master track has a signal chain. Each signal chain consists of a series of effects that are applied to that track's submix. You can view a track's signal chain in the deck by clicking on the track's head in the editor pane of the event editor window.
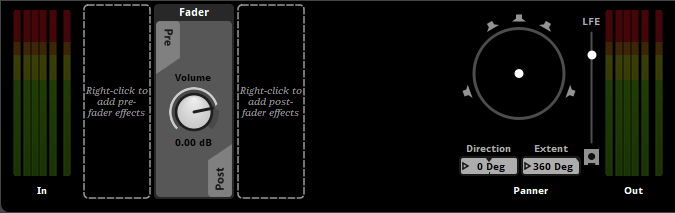
The effects in a signal chain are applied from left to right in the order they appear in the deck. By default, a signal chain contains only its fader, a volume control.
At the left and right ends of the deck are the track's input and output meters. Each input or output meter consists of a number of sub-meters, one for each channel in the track's input or output channel format; these sub-meters display the volume of the signal in the corresponding channel.
By default, a track's input and output meters are set to "Automatic" channel format, meaning that they adopt the channel format of the signal routed into them with the highest number of channels, or the platform's channel format if any of the signals routed into them is set to "platform" channel format. You can change the channel format of a track's input or output meters by right-clicking on them and selecting a new format from the context menu.
If a track's output channel format is something other than mono, a panner appears at the right end of the track, to the left of the track's output meter.


The track panner allows you to adjust the panning of the signal. This adjustment is in addition to, and independent of, any adjustments to panning applied by spatialization.
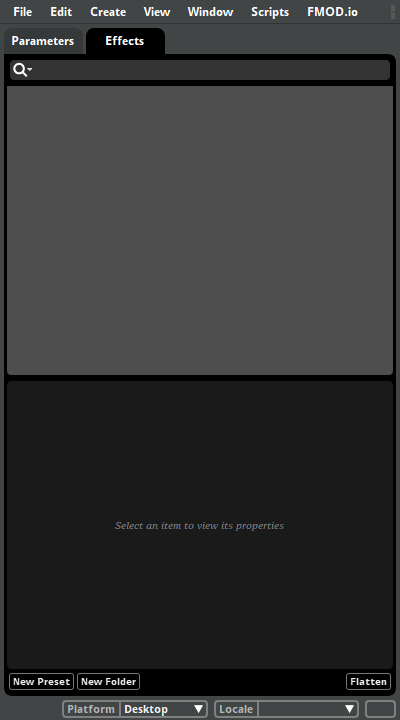
2.8 Effects
Effects can be inserted at any point in your project's signal chains in order to process and modify the signal at that point. The properties of those effects can then be updated and adjusted in real time as your game runs, allowing the sound of anything and everything in your game to be processed differently in response to changing in-game circumstances.

There are a variety of effects available, each with numerous possible applications. For example, a game could use multiband EQ effects to cutoff high frequencies whenever the player avatar is underwater, or to represent hearing damage after an explosion. The same game might use an delay effect to simulate the echo in a cavern, or to produce feedback on an in-game two-way radio.
Detailed descriptions of effects can be found in the Effect Reference chapter.
In FMOD Studio, each effect in a signal chain is represented by a panel in the deck when a bus or track is selected in the mixing desk or editor.
Most effects can be inserted into the signal chains of both mixer buses and event tracks. Within a signal chain, effects can be arranged into any order, both pre- and post-fader, and can be interspersed freely with other effects and sends.
You can add new effects to a signal chain by right-clicking on the signal chain where you want the effect to be placed and selecting 'Add Effect' or 'Insert Effect' from the context menu.
2.8.1 Preset effects
Preset effects are a way of creating the same behavior in a large number of events without having to update each of those events individually when you want to change that behavior.
All instances of a preset effect in a project share the same base property values, modulators, and automation. Changing the base property values, modulators, or automation of any instance of a preset effect therefore changes all other instances of that preset effect. Preset effects in the deck feature a preset icon, which resembles an arrow inside a circle. This icon blinks whenever the preset effect changes.


This means that you can, for example, create a single spatializer preset effect for all the 3D events in your project. If you later need to tweak this spatializer's min and max distance properties, you only need to make the change to the preset effect once, instead of having to change each and every 3D event in your project individually.
Note that different instances of a preset effect may be in different states due to differences in their parent event instances. For example, two event instances containing instances of a preset effect may have different parameter values, and thus result in those preset effect instances having different final property values if they feature automation on that parameter.
You can manage your project's preset effects in the effects tab of the preset browser window.
To create a new preset effect, right-click in the empty space in the effects browser and select the "New Preset" context menu item, then navigate to the specific effect you want the new preset effect to be. You can also convert an existing effect in your project into a preset effect by right-clicking on it in the deck and selecting "Convert to Preset" from the context menu.
Note that you can create multiple preset effects from the same effect, each with its own base property values, modulation, and automation. You can also add effects to signal chains that aren't instances of a preset effect, even if you have already created a preset effect of that same effect, and that such effects' base property values, modulation and automation can be changed without affecting the preset effect, and vice versa.
Once a preset effect has been created, you can add instances of it to signal chains throughout your project. To add an instance of a preset effect to a signal chain, either drag it from the presets browser to the deck, or right-click on the deck and select "Add Effect > Preset Effects" (or "Insert Effect > Preset Effects") and then the specific effect you want from the context menu.
You can detach an instance of a preset effect from the preset effect. This causes it to become an independent effect whose base property values, automation, and modulation can be adjusted without altering the base property values, automation, and modulation of the preset effect. To disconnect an instance of a preset effect from that preset effect, right-click on it in the deck and select "Detach from Preset" from the context menu.
2.9 Parameters and Key Off Commands
Events don't have to be "fire and forget." There are two major ways to change what an event is doing while it's playing, and those two ways are parameters and key off commands.
2.9.1 Parameters
Parameters are properties of an event that can be updated at any time by your game's code, and you can hook them up to nearly anything else in an event: You can use parameters to automate the values of event properties, and to control the event's timeline through logic markers.
However, the most common use of parameters is to trigger the instruments on the event's parameter sheets. Each instrument can have one or more trigger conditions that must all be met for the instrument to begin playing. A parameter condition is a kind of trigger condition that requires a certain parameter's value to be within a certain range.
There are several different types of parameter, of which the most common is the timeline. Timeline parameters have the special property of automatically advancing over time while the event is playing.
Parameters can be local or global. The value of a local parameter can be set to different values in different event instances, allowing different instances of the same event to produce different output. By contrast, each global parameter has just one value that is shared between all events and event instances that use the parameter.
Your game's code can change the current value of any parameter by using the FMOD Studio API. Parameter values can also be controlled by modulators, by automation, or by events that reference the event a local parameter is in.
For more information about parameters, see the Parameters section of the Authoring Events chapter.
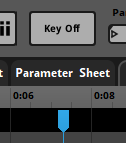
2.9.2 Key Off Commands
Key off commands are much less common than parameters. A key off command tells the timeline playback position of an event instance to move past the next sustain point instead of remaining in place when it is at that sustain point.

For more information about key off commands and sustain points, see Studio::EventInstance::keyOff in the FMOD Engine User Manual.
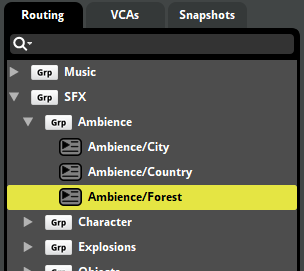
2.10 Routing and Mixing
Events in FMOD Studio do not exist in a vacuum. Their output is routed into the project mixer. The project mixer consists of a number of interconnected buses. By customizing these buses' routing, properties and effects in the mixer window, it's possible to create a complex mix for your project.
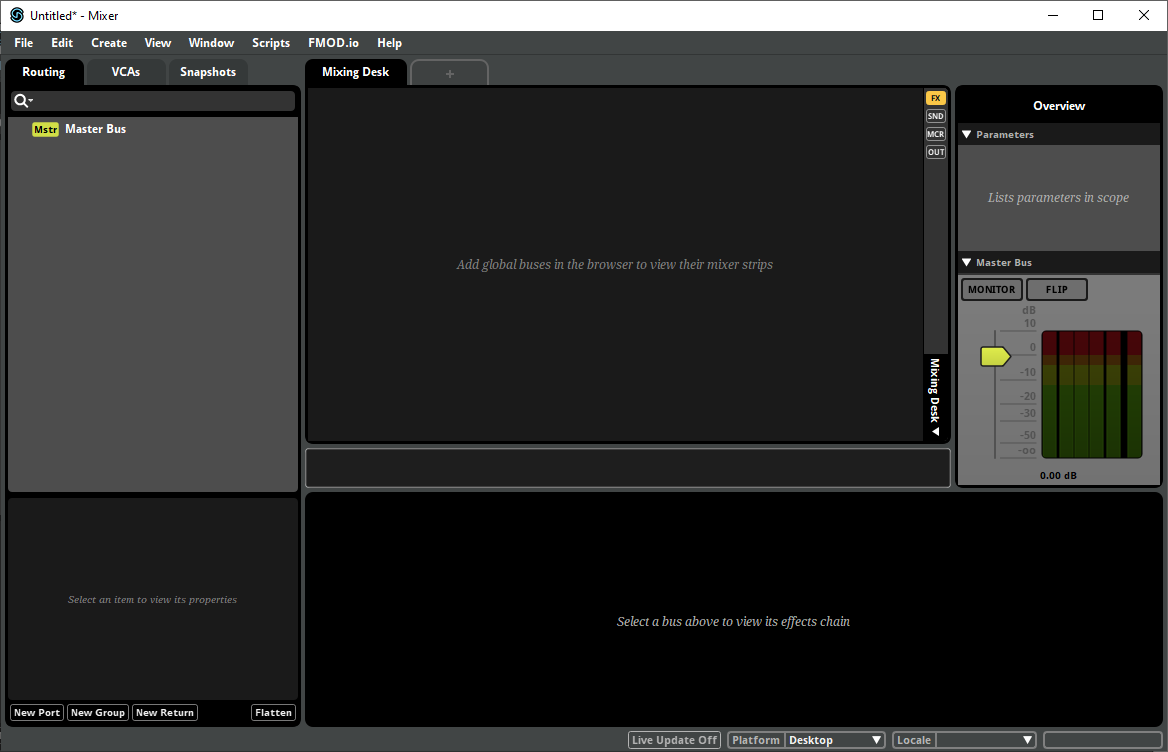
Events and return buses are routed into group buses or the master bus, group buses are routed into other group buses, and eventually everything routes into the project's master bus. Every bus along the way creates a submix of all the signals that route into it.
Your project's routing can be inspected and modified in the routing browser. In this browser, the signal flows from right to left, and from the buses and events at the left edge of the browser into the project's master bus. You can also add sends to buses' signal chains to duplicate their signals, and send the duplicated signals to return buses.
Every bus has its own volume property and signal chain that alters the signal passing through it. By customizing the properties and signal chains of your buses, you can tailor each submix in your project. The signal chain of any bus can be viewed in the deck by selecting the bus in the mixing desk or mixer window's routing browser.
Once your project's routing and effects are in place, you can use the mixer strips in the mixing desk to tweak and customize the overall mix to fit your project's requirements.
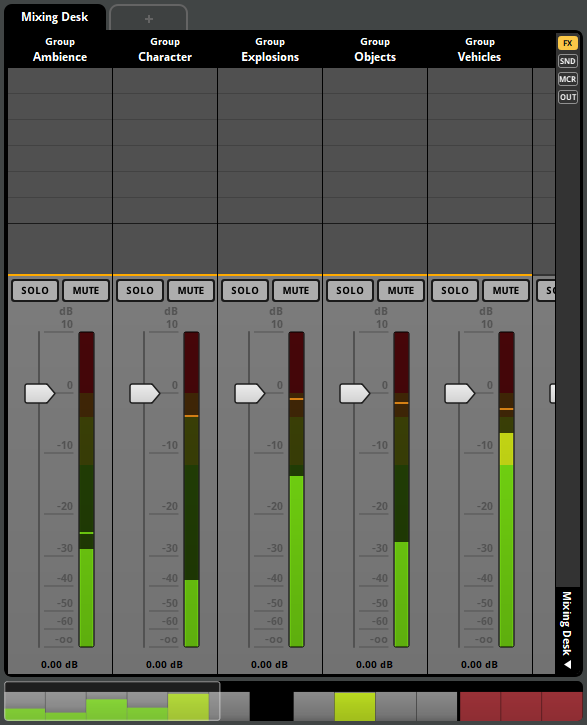
The meter on each mixer strip represents the output volume of the corresponding bus, and a horizontal orange line indicates that the corresponding bus is active. You can click and drag a mixer strip's slider handle to adjust the bus's fader volume. If you connect FMOD Studio to a running copy of your game, you can even adjust the mix of your game project as it runs.
It's even possible to make the mix dynamic by creating snapshots that adjust the values some or all of the properties in the mixer when active. For more information about snapshots, see Snapshots and the Tracks View in the Mixing chapter.
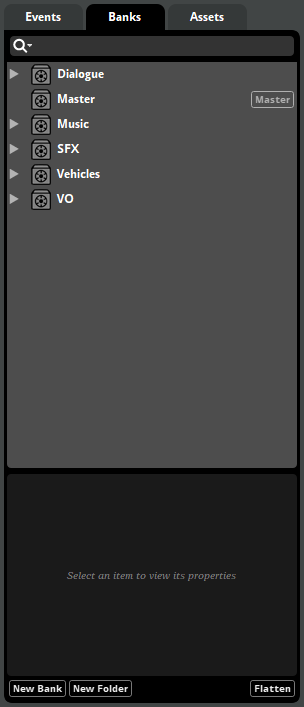
2.11 Banks
A bank is a collection of events and assets from your FMOD Studio project, formatted and compressed for use in your game. The purpose of banks is to let you choose which content from your project is loaded by your game at any given time, allowing you greater control over how much memory your game's audio consumes. Banks can be created, edited, and organized in the banks browser, under the banks tab of the event editor window.
Before an event can be used in your game, you need to assign it to at least one bank, and that bank needs to be built. To assign an event to a bank, right-click on the event in the events browser, then select "Assign to Bank" from the context menu. For information about building banks, see the Building section of this chapter.
2.11.1 The Master Bank
In addition to normal banks, every FMOD Studio project contains at least one master bank. The master bank contains data relevant to your entire FMOD Studio project, and so must be loaded into memory before any event in any bank can be played by your game.
Because a master bank is loaded into memory at all times, it is generally best for performance to keep it as small as possible by assigning no events to it.
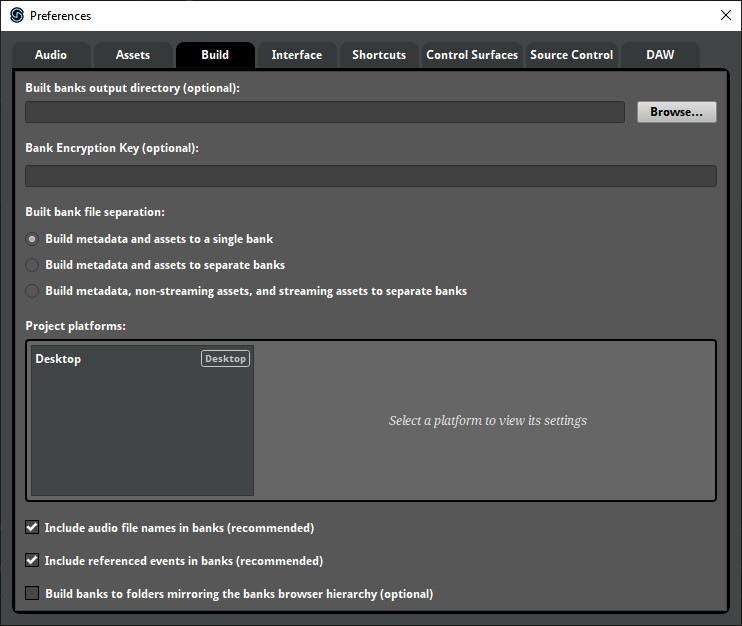
2.12 Building
To build your project's banks for use in your game, select "File > Build..." You can also build individual banks by right-clicking on the desired bank in the banks browser and selecting "Build..." from the context menu, and you can build your banks for every platform in your project platforms list by selecting "File > Build All Platforms..."
Building your banks causes the built .bank files to appear in your project's built banks output directory. These built .bank files are all that your game's code needs to play the events they contain.
In most cases, your game's code should load a bank into memory with Studio::System::loadBankFile and Studio::Bank::loadSampleData some time before using any of the events it contains, then create and play instances of that bank's events with Studio::EventDescription::createInstance and Studio::EventInstance::start.
You can load multiple banks into memory, but to conserve memory it's best to unload banks that your game is unlikely to use in the near future.
For more detailed information about using built banks in the FMOD Engine, see the Bank Loading section of the FMOD Engine User Manual.
2.13 Platforms
When developing content in FMOD Studio, it is useful to bear in mind the platforms that content is intended to be used on. Depending on the needs of your project, different platforms may budget different amounts of memory and processing power for audio, and some platforms may support different numbers and configurations of speakers.
Because platforms are so important, you can specify certain settings on a per-platform basis. These settings include project output format, the encoding settings of audio files, and the platform exclusion settings of tracks and effects.
By default, each FMOD Studio project has one platform, called "Desktop." The current platform is displayed in the bottom-right of most FMOD Studio windows. You can change the current platform by clicking on the current platform display and selecting a new platform from the dropdown menu.

You can rename platforms, add additional platforms to the project, and change the speaker configurations and default encoding settings of existing platforms in the build tab of the preferences dialog.